Creating a pokemon guesser
Introduction
“Who’s that pokemon?” is a well known trivia game where people are shown silhouette of a pokemon and then try to guess its name. In this post, I will recreate the images. To do so, I start off with a colored image of a pokemon, and then extract its sihoulette using contour detection. In addition to the base game, I will also add some flavors. For example: adding hints by showing a pixelated image, or revealing part of the original image.

Getting the base images
It’s best to get all base images from the same source so that the art style is consistent. pokemondb.net has a nice and complete list of images from all generations. In the code to download images, I have added some random delay to slow down the requests.
import requests
import random
import time
import pandas as pd

try:
    plist = pd.read_csv('./resources/pokemon_list.csv', usecols=['pokemon'])['pokemon'].tolist()
except:
    # fallback in case file's not available
    plist = ['carvanha', 'tangrowth', 'simisear', 'scyther', 'tentacruel', 'clawitzer',
        'trevenant', 'gardevoir', 'venomoth', 'perrserker']

if __name__ == '__main__':

    for idx, pokemon_name in enumerate(plist):
        image_url = f'https://img.pokemondb.net/artwork/vector/large/{pokemon_name}.png'


        img_data = requests.get(image_url).content
        with open(f'./resources/img_pokemon_png/{pokemon_name}.png', 'wb') as handler:
            handler.write(img_data)

        time.sleep(random.random() * 5)
Processing the image
The steps to process the images are:
- Convert to grayscale (and optionally, image thresholding)
- Choose a contour retrieval method
- Adding background
Read image, convert to grayscale, and thresholding
While processing images, I like to create multiple subplots to keep reference of the original image and keep track of the transformations.
import cv2
import matplotlib.pyplot as plt


file_name = 'resources/img_pokemon_jpg/amoonguss.jpg'

# here I keep both the colored and grayscale images to better visualise the output
# note that cv2 use BGR color space,
# so we need to use cv2.cvtColor method to convert back to RGB
# when plotting with `matplotlib` to show true colors

img_bgr = cv2.imread(img, cv2)
img_gray = cv2.imread(file_name, cv2.IMREAD_GRAYSCALE)
Finding contours
fig, axes = plt.subplots(ncols=2, nrows=1, figsize=(12, 6), sharey=True)

axes[0].set_title('Original Image', fontsize=14)
axes[1].set_title('Grayscaled Image', fontsize=14)
axes[2].set_title('All Contours', fontsize=14)
axes[3].set_title('External Contours', fontsize=14)

# orignal image
axes[0].imshow(img_rgb)

# greyscaled image
ret, thresh = cv2.threshold(img_gray, 100, 255, 0)
axes[1].imshow(cv2.cvtColor(img_gray, cv2.COLOR_BGR2RGB))
axes[0].imshow(thresh)
From the documentation, cv2.findContours has 4 different retrieval modes:
RETR_EXTERNAL: retrieves only the extreme outer contours (what we want)RETR_LIST: retrieves all of the contours without establishing any hierarchical relationships.RETR_CCOMP: retrieves all of the contours and organizes them into a two-level hierarchy. At the top level, there are external boundaries of the components. At the second level, there are boundaries of the holes. If there is another contour inside a hole of a connected component, it is still put at the top level.RETR_TREE:retrieves all of the contours and reconstructs a full hierarchy of nested contours.
We only need the outer contour, so I will run with RETR_EXTERNAL flag. However, to illustrate the different possibilities, I will plot both the External Contours and all contours.
# all contours
contours, _ = cv2.findContours(img_gray, cv2.RETR_LIST, cv2.CHAIN_APPROX_NONE)
canvas = np.zeros_like(img_gray)
cv2.drawContours(canvas, contours, -1, (255, 255, 0), 3)
axes[2].imshow(canvas)


# external contours
contours, _ = cv2.findContours(img_gray, cv2.RETR_EXTERNAL, cv2.CHAIN_APPROX_NONE)
canvas = np.zeros_like(img_gray)
cv2.drawContours(canvas, contours, -1, (255, 255, 0), 3)
axes[3].imshow(canvas)

Merging contour with the background
The remaining task is to add a background to the sihlouette. A simple solution is just to align the siloulette’s centroid with a chosen point on the background. Since the background image can be recycled, I can hardcode the coordiate and here I chose the point at 600, 550
CENTER_COORDS = 600, 550
FILL_COLOR =  (142, 100, 46)

def shift_center(contours, center_coords=CENTER_COORDS):
    """
    align the image with the template
    """

    # find centroid of the sihoulette
    M = cv2.moments(contours[0])

    cX = int(M["m10"] / M["m00"])
    cY = int(M["m01"] / M["m00"])

    # calculate distance to shift
    delta_X = center_coords[0] - cX
    delta_Y = center_coords[1] - cY

    # contours are returned as tuple (numpy_array, )
    coords_array = contours[0]

    coords_array[:, :, 0] = coords_array[:, :, 0] + delta_Y
    coords_array[:, :, 1] = coords_array[:, :, 1] + delta_X

    return contours


# read template image
template_path = './resources/template.jpg'

contours = shift_center(contours)


base = cv2.imread(template_path)
cv2.drawContours(base, contours, -1, thickness=2, lineType=cv2.LINE_AA, color=(0, 0, 0))
plt.imshow(base)

# color the contour to create silhouette effects
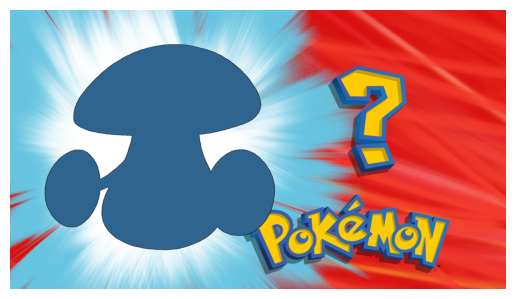
Final result
Putting everything together, we achieve what looks just like the original game! Perhaps you might want to play around with positioning, or trying out different colors depending on your creativity.
More to come
In addition to the basic silhouette effects, I’ve also tinkered with pixelating and re-coloring the images to add some variations. I will make a follow up post sharing the process.
![]()